Embark on the journey of downloading and installing Android Studio, the powerhouse for Android app development. Get ready to dive into a world of innovation and creativity as we explore the ins and outs of this essential tool.
From understanding its significance to mastering the installation process, this guide has got you covered every step of the way.
Introduction to Android Studio
Android Studio is the official IDE (Integrated Development Environment) for Android app development, providing a comprehensive suite of tools for developers to create, test, and debug their applications. It is specifically designed to streamline the app development process and enhance productivity.
Features and Advantages of Android Studio
- Intuitive UI Design Tools: Android Studio offers a drag-and-drop interface for designing app layouts, making it easier for developers to create visually appealing user interfaces.
- Code Editing and Refactoring: The IDE comes equipped with powerful code editing features, including auto-completion, refactoring tools, and code analysis to help developers write clean and efficient code.
- Emulator and Device Testing: Android Studio provides built-in emulators and support for testing on physical devices, allowing developers to test their apps on a variety of Android platforms.
- Performance Profiling: Developers can use Android Studio to analyze the performance of their apps, identify bottlenecks, and optimize code for better efficiency.
Latest Version of Android Studio
Android Studio 4.2 is the latest release, featuring improvements in areas such as Motion Editor, Database Inspector, and a new Unified App Bundle format. These updates aim to enhance the overall development experience and make it easier for developers to build high-quality Android applications.
System Requirements
To ensure the successful download and installation of Android Studio, it is crucial to meet the minimum system requirements and have the necessary hardware specifications in place.
Minimum System Requirements
- Operating System: Windows 7/8/10 (32- or 64-bit), macOS 10.10 (Yosemite) or higher, or a Linux-based OS.
- RAM: 4 GB RAM minimum, 8 GB RAM recommended.
- Disk Space: 4 GB disk space minimum, 8 GB recommended (including system requirements and space for apps).
- Screen Resolution: 1280 x 800 minimum screen resolution.
Compatibility with Operating Systems
Android Studio is compatible with a variety of operating systems, including Windows, macOS, and Linux. It is essential to download the version that corresponds to your operating system to ensure smooth installation and performance.
Hardware Specifications
- Processor: Intel Core i3 or higher, AMD Ryzen 3 or higher.
- Graphics: 1280 x 800 minimum screen resolution.
- Internet Connection: Required for downloading necessary components and updates.
- Virtualization Technology: Intel Hardware Accelerated Execution Manager (HAXM) is recommended for Intel processors, while AMD processors can use Windows Hypervisor Platform (WHPX).
Downloading Android Studio
Downloading Android Studio is a crucial step in starting your app development journey. Below are the steps to download Android Studio from the official website, alternative sources, and details on file size and estimated download time.
Official Website Download
To download Android Studio from the official website, follow these steps:
- Go to the official Android Studio website at https://developer.android.com/studio .
- Click on the “Download Android Studio” button.
- Choose your operating system (Windows, Mac, Linux) and click “Download”.
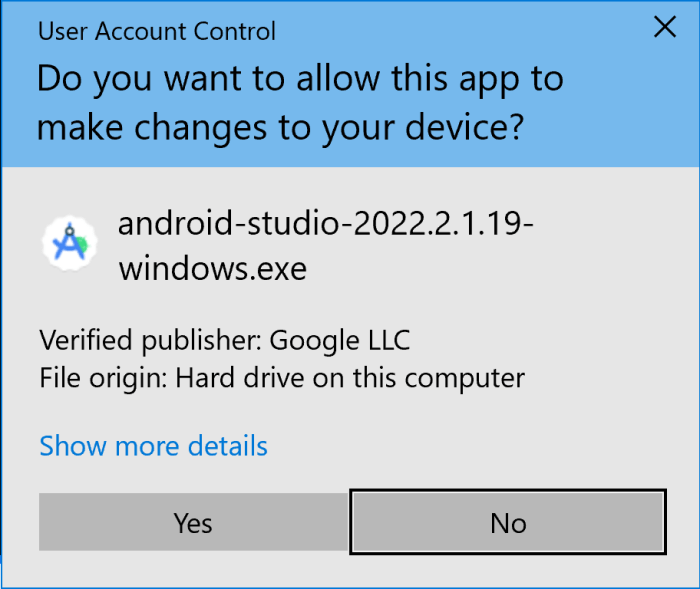
- Once the download is complete, run the installer and follow the on-screen instructions to install Android Studio on your computer.
Alternative Sources
If you encounter any issues with downloading from the official website, you can consider alternative sources such as:
- Downloading from reputable software download websites like Softonic or FileHippo.
- Using a torrent client to download Android Studio from trusted sources.
File Size and Download Time
The file size of Android Studio varies depending on the operating system, but it is typically around 800 MB to 1.5 GB. The download time will also depend on your internet speed:
For a 10 Mbps connection, the estimated download time for Android Studio would be around 10-20 minutes.
Installing Android Studio

After downloading Android Studio, the next step is to install it on your system. Below are the steps for installing Android Studio on Windows, macOS, and Linux.
Windows Installation
- Double-click the downloaded installation file to launch the setup wizard.
- Follow the on-screen instructions to choose the installation location and components you want to install.
- Click “Next” to proceed with the installation.
- Once the installation is complete, you can launch Android Studio by double-clicking the shortcut on your desktop.
macOS Installation
- Open the downloaded .dmg file and drag Android Studio into the Applications folder.
- Open Android Studio from the Applications folder and follow the setup wizard instructions.
- Complete the installation by following the on-screen prompts.
- After installation, you can launch Android Studio from the Applications folder.
Linux Installation
- Extract the downloaded .zip file to your desired installation location.
- Open a terminal and navigate to the extracted folder.
- Run the studio.sh script to start the installation process.
- Follow the setup wizard instructions to complete the installation.
Troubleshooting Tips
- If you encounter installation issues, ensure your system meets the minimum requirements for Android Studio.
- Check for any antivirus or firewall settings that may be blocking the installation process.
- Try running the installation as an administrator on Windows to avoid permission issues.
- Make sure you have a stable internet connection during the installation process to avoid any download errors.
Setting up Android Virtual Device (AVD)
Setting up an Android Virtual Device (AVD) is crucial for testing Android apps before deploying them on actual devices. It allows developers to simulate various device configurations and screen sizes to ensure that the app functions correctly across different platforms.
Creating a new AVD in Android Studio
To create a new AVD in Android Studio, follow these steps:
- Open Android Studio and navigate to the “Tools” menu.
- Select “AVD Manager” from the dropdown list.
- Click on the “Create Virtual Device” button to start the AVD creation process.
- Choose a hardware profile for the virtual device, such as a Pixel device or Nexus device.
- Select a system image for the virtual device, based on the Android version you want to test.
- Configure additional settings like RAM, VM heap, and device orientation.
- Click on the “Finish” button to create the new AVD.
Configuration options for customizing AVD settings
When creating a new AVD, developers have a range of configuration options to customize the settings according to their requirements. Some of the key options include:
- Screen Size and Resolution: Adjust the screen size and resolution to simulate different device displays.
- RAM and Storage: Allocate specific amounts of RAM and storage to the virtual device for optimal performance.
- Graphics: Configure graphics acceleration to enhance the visual experience of the virtual device.
- Network: Set up network connectivity options to test app behavior under various network conditions.
- Advanced Settings: Explore advanced settings for CPU/ABI, camera, sensors, and more to fine-tune the AVD.
Exploring Android Studio Interface
When you first open Android Studio, you will be greeted with a complex interface designed to help you develop Android applications efficiently. Let’s explore the different components of the Android Studio interface and understand their purpose and functionality.
Components of Android Studio Interface
- 1. Menu Bar: Located at the top of the screen, it provides access to various commands and settings.
- 2. Toolbar: Below the menu bar, it contains shortcuts to common actions like running the app or syncing the project with Gradle files.
- 3. Project Window: On the left side, it displays the files and folders of your project for easy navigation.
- 4. Editor Window: In the center, it is where you write and edit your code.
- 5. Component Tree: Usually found on the bottom left, it shows the layout hierarchy of your app’s UI.
- 6. Logcat: Located at the bottom, it displays system messages, warnings, and errors during app execution.
- 7. Gradle Console: Also at the bottom, it shows the status of Gradle builds and syncs.
Key Tools and Panels in Android Studio
- 1. AVD Manager: It allows you to create and manage Android Virtual Devices for testing your app on different devices.
- 2. SDK Manager: Helps you download, update, and manage Android SDK components.
- 3. Code Editor: Offers features like code completion, refactoring, and navigation to enhance coding experience.
- 4. Design Editor: Enables you to visually design your app’s UI and XML layout files.
Customizing the Interface
- 1. Theme: You can change the theme of Android Studio under the Appearance settings to suit your preferences.
- 2. Layout: You can rearrange and resize panels according to your workflow by dragging and dropping them.
- 3. Shortcuts: Customize keyboard shortcuts for different actions in the Keymap settings for quicker access.
Final Review

In conclusion, downloading and installing Android Studio opens up a world of possibilities for app developers. With the right tools and knowledge in hand, you’re now equipped to bring your app ideas to life with ease. Dive in and let your creativity soar in the world of Android app development!