Embark on a journey to master the installation process of Android Studio, diving into the world of app development with this detailed guide. From system requirements to troubleshooting, get ready to unleash your coding potential.
Introduction to Android Studio
Android Studio is the official Integrated Development Environment (IDE) for Android app development, designed by Google. It plays a crucial role in creating, testing, and deploying Android applications efficiently.
Features and Benefits of Android Studio
Android Studio offers a wide range of features that simplify and enhance the app development process:
- Advanced code editing tools for improved productivity.
- Robust debugging capabilities to identify and fix issues quickly.
- Integration with Firebase for easy cloud storage and real-time database functionality.
- Support for multiple languages and frameworks, making it versatile for developers.
Android Studio’s benefits include faster development cycles, seamless integration with Android SDKs, and access to a vast library of resources and plugins.
Successful Apps Built Using Android Studio
Instagram, WhatsApp, and Uber are examples of successful apps developed using Android Studio.
These apps have millions of users worldwide, showcasing the power and reliability of Android Studio for creating top-notch applications.
System Requirements
To run Android Studio smoothly and efficiently, it is essential to ensure that your system meets the minimum requirements. Below, we will discuss the necessary specifications and recommendations for optimal performance.
Minimum System Requirements
- Operating System: Windows (7/8/10), macOS (10.10 or higher), or Linux
- RAM: 8GB RAM or higher recommended
- Disk Space: 4GB of available disk space minimum, 8GB recommended
- Screen Resolution: 1280×800 minimum screen resolution
- Java Development Kit (JDK): Version 8 or higher
Compatibility with Operating Systems
- Android Studio is compatible with Windows, macOS, and Linux operating systems.
- For Windows, Android Studio supports versions 7, 8, and 10.
- On macOS, Android Studio is compatible with version 10.10 or higher.
- Linux users can also run Android Studio on their systems.
Optimizing System Performance
- Close unnecessary applications and processes to free up system resources.
- Ensure your system is up to date with the latest software updates.
- Allocate more RAM to Android Studio for smoother performance.
- Use an SSD (Solid State Drive) for faster read/write speeds and improved overall performance.
Downloading Android Studio
To begin developing Android applications, you need to download Android Studio. This integrated development environment (IDE) provides all the necessary tools for creating Android apps efficiently.
Step-by-step Guide to Download Android Studio
- Visit the official Android Studio website at https://developer.android.com/studio .
- Click on the “Download” button on the website.
- Choose the appropriate version for your operating system (Windows, macOS, or Linux).
- Follow the on-screen instructions to complete the download process.
Alternative Sources for Downloading Android Studio
- Some alternative sources for downloading Android Studio include software download websites like Softonic or FileHorse.
- However, it is recommended to download Android Studio directly from the official website to ensure you get the latest and most secure version.
Verifying the Authenticity of the Downloaded Android Studio Package
- Check the file size of the downloaded package and match it with the official website’s specifications.
- Verify the digital signature of the package to confirm its authenticity.
- Run a virus scan on the downloaded file before installation to ensure it is safe to use.
Installing Android Studio
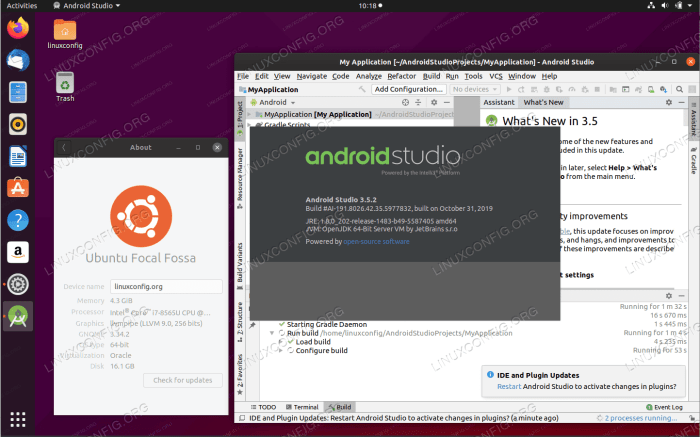
To install Android Studio on your computer, follow the steps below based on your operating system.
Windows
- Download the Android Studio package from the official website.
- Run the downloaded .exe file and follow the installation wizard instructions.
- Choose the components you want to install and select the installation location.
- After the installation is complete, launch Android Studio and set up the SDK components.
macOS
- Download the Android Studio package for macOS from the official website.
- Open the .dmg file and drag the Android Studio icon to the Applications folder.
- Launch Android Studio from the Applications folder and set up the necessary SDK components.
Linux
- Download the Android Studio package for Linux from the official website.
- Extract the downloaded .zip file to a desired location on your system.
- Navigate to the bin directory in the extracted folder and run the studio.sh file to start Android Studio.
Common Installation Issues
- If you encounter any installation errors, make sure your system meets the minimum requirements specified by Android Studio.
- Ensure you have a stable internet connection during the installation process to download necessary components.
- Check for any antivirus or firewall settings that may be blocking the installation.
- If the installation fails, try restarting your computer and running the installation process again.
Setting up Android Studio
Once you have Android Studio installed, it’s essential to set it up correctly to ensure optimal performance. This involves configuring settings, setting up the Android Virtual Device (AVD) for testing apps, and utilizing the SDK Manager effectively.
Configuring Android Studio Settings
- Open Android Studio and go to File > Settings.
- Adjust settings related to appearance, keymaps, plugins, and more based on your preferences.
- Make sure to allocate enough memory to Android Studio to prevent lagging or crashing.
- Regularly check for updates and apply them to keep the software running smoothly.
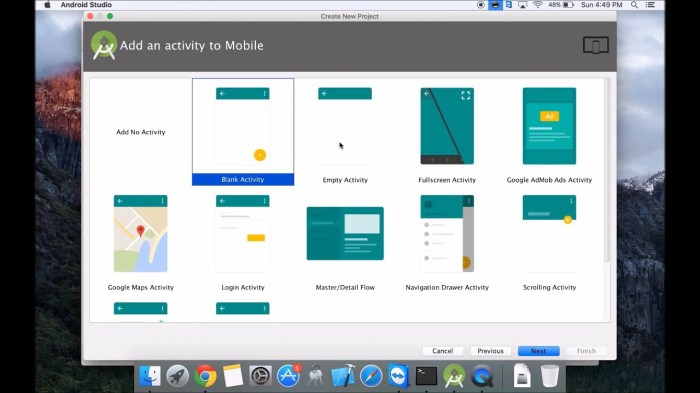
Setting up Android Virtual Device (AVD)
- Access the AVD Manager by clicking on the AVD icon in the toolbar.
- Create a new virtual device by selecting a device definition and system image that matches your testing needs.
- Configure hardware options such as RAM size, screen size, and more to simulate various devices for testing.
- Run your app on the AVD to test its functionality on different Android versions and screen sizes.
Using SDK Manager Effectively
- The SDK Manager allows you to download additional SDK components, platforms, tools, and system images for development.
- Access the SDK Manager through Tools > SDK Manager in Android Studio.
- Install the necessary SDK components for your app development, including platform tools, build tools, and system images for testing.
- Regularly check for updates and install them to ensure you have the latest features and bug fixes.
Exploring Android Studio Interface
When you open Android Studio for the first time, the interface might seem overwhelming, but it’s designed to enhance your development experience. Let’s break down the different sections and key features to help you navigate smoothly.
Sections of the Interface
- The Project Window: This section displays all the files and folders in your project. You can easily navigate through your project structure and access different files.
- The Code Editor: This is where you write your code. It provides syntax highlighting, code completion, and other helpful features to make coding easier and more efficient.
- The Toolbar: The toolbar contains various buttons and tools for building, running, and debugging your application. It gives you quick access to essential functions.
Key Features and Functionality
- Project Window: Use the project window to organize your project files, create new files, and manage dependencies. You can also search for specific files or classes within your project.
- Code Editor: The code editor offers code completion, refactoring tools, and real-time error checking. It helps you write clean and efficient code by providing suggestions and highlighting potential issues.
- Toolbar: The toolbar includes buttons for running your app, debugging, and managing version control. You can customize the toolbar to add or remove buttons based on your workflow preferences.
Customizing the Interface
- Theme: Android Studio offers different themes to customize the appearance of the interface. You can choose a light or dark theme based on your preference.
- Layout: You can adjust the layout of different windows and panels in Android Studio to suit your workflow. Drag and drop windows to rearrange them and create a workspace that works best for you.
- Shortcuts: Learning keyboard shortcuts can help you navigate the interface more efficiently. Android Studio provides a list of default shortcuts, and you can customize them to match your workflow.
Conclusive Thoughts
In conclusion, mastering the installation of Android Studio opens doors to endless possibilities in creating innovative apps. So, roll up your sleeves, follow the steps, and let your app development dreams take flight!