Install Snyk CLI kicks off an exciting journey into the realm of software security, offering a comprehensive look at its installation process and functionality. Get ready to dive into the world of vulnerability scanning and enhanced security practices with this powerful tool.
The installation process of Snyk CLI across different operating systems and its seamless integration with CI/CD pipelines will revolutionize the way you approach security in your projects.
Introduction to Snyk CLI
Snyk CLI, or Command Line Interface, is a powerful tool used in software development to help developers identify and fix vulnerabilities in their code. It allows users to scan their projects for security issues, manage dependencies, and monitor open source components for any known vulnerabilities.
Scenarios where using Snyk CLI is beneficial
- When working on projects with multiple dependencies to ensure they are secure and up-to-date.
- For continuous security monitoring to catch vulnerabilities early in the development process.
- When integrating security checks into the CI/CD pipeline for automated vulnerability scanning.
Key features of Snyk CLI
- Scan projects for vulnerabilities in open source dependencies.
- Provide actionable insights and recommendations for fixing security issues.
- Integrate with popular development tools and platforms for seamless security testing.
- Support for multiple programming languages and package managers.
Installation Process
To install Snyk CLI on your system, follow the step-by-step instructions below based on your operating system.
Windows
- Ensure you have Node.js installed on your system.
- Open the Command Prompt.
- Run the following command to install Snyk CLI:
npm install -g snyk
macOS
- Make sure you have Homebrew installed on your system.
- Open the Terminal.
- Run the following command to install Snyk CLI:
brew install snyk
Linux
- Ensure you have Node.js installed on your system.
- Open the Terminal.
- Run the following command to install Snyk CLI:
npm install -g snyk
Setting up Snyk CLI
To set up Snyk CLI after installation, you need to configure it according to your preferences and authenticate it with your Snyk account.
Configuration Options and Customization
- You can customize the default behavior of Snyk CLI by modifying the configuration options.
- Some common configuration options include setting the default organization, specifying the output format, and adjusting the severity threshold for vulnerabilities.
- To customize these options, you can use the `snyk config set` command followed by the specific configuration parameter and value.
- For example, to set the default organization, you can use `snyk config set org=your-organization-name`.
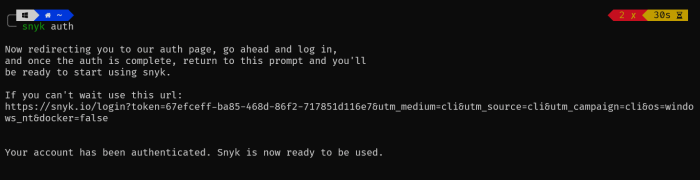
Authentication with Snyk Account
- Authentication with your Snyk account is essential to access your projects and perform security tests using Snyk CLI.
- To authenticate Snyk CLI, you can use the `snyk auth` command, which will prompt you to log in to your Snyk account through the CLI.
- After successful authentication, Snyk CLI will be linked to your Snyk account, allowing you to manage your projects securely.
Using Snyk CLI

When using Snyk CLI, you can perform vulnerability scanning on your projects and dependencies to identify and address security issues in your code. This helps you ensure that your applications are secure and free from potential threats.
Common Commands for Vulnerability Scanning
- To scan a project for vulnerabilities:
- To scan dependencies for vulnerabilities:
- To monitor projects for new vulnerabilities:
snyk test
snyk test –all-projects
snyk monitor
Scanning Projects and Dependencies
- To scan a specific project:
- To scan dependencies in a project:
snyk test /path/to/project
snyk test –file=path/to/package.json
Interpreting Scan Results and Taking Actions
- After running a scan, review the results to identify any vulnerabilities detected.
- Take necessary actions to resolve vulnerabilities, such as updating dependencies or applying patches.
- Re-scan your projects regularly to ensure ongoing security monitoring and maintenance.
Integrations and Extensibility
When it comes to enhancing security practices and streamlining development workflows, integrating Snyk CLI with various tools and extending its functionality through plugins or custom scripts can be highly beneficial. Let’s explore how these integrations and extensibility options can be leveraged effectively.
Integrating Snyk CLI with CI/CD Pipelines
Integrating Snyk CLI with CI/CD pipelines allows for automated security testing throughout the development lifecycle. This ensures that vulnerabilities are identified early on and can be addressed promptly. By incorporating Snyk CLI into the CI/CD process, developers can seamlessly scan their code for security issues without disrupting the workflow.
Extending Snyk CLI Functionality with Plugins and Custom Scripts
Developers have the flexibility to extend Snyk CLI’s functionality by creating custom plugins or scripts tailored to their specific requirements. This enables them to integrate additional security checks, automate tasks, or customize the tool to suit their unique needs. By leveraging plugins and custom scripts, developers can enhance the capabilities of Snyk CLI and optimize their security practices.
Enhancing Security Practices with Integrated Tools
Integrating Snyk CLI with other tools, such as IDEs, version control systems, or issue trackers, can further enhance security practices. For instance, by integrating Snyk CLI with an IDE, developers can receive real-time feedback on security vulnerabilities while coding. Similarly, integrating Snyk CLI with issue trackers can facilitate seamless tracking and resolution of security issues. These integrations help create a more cohesive security ecosystem and promote a proactive approach to security.
Final Summary
In conclusion, installing Snyk CLI opens up a world of possibilities for developers looking to fortify their software against vulnerabilities. With its intuitive features and extensibility, Snyk CLI is a must-have tool in every developer’s arsenal.