Install Sonatype Nexus sets the stage for this enthralling narrative, offering readers a glimpse into a story that is rich in detail with informal but serious style and brimming with originality from the outset.
Sonatype Nexus is a crucial tool in software development, ensuring secure and efficient management of repositories. Let’s dive into the steps of installation, configuration, repository management, and user handling to harness its full potential.
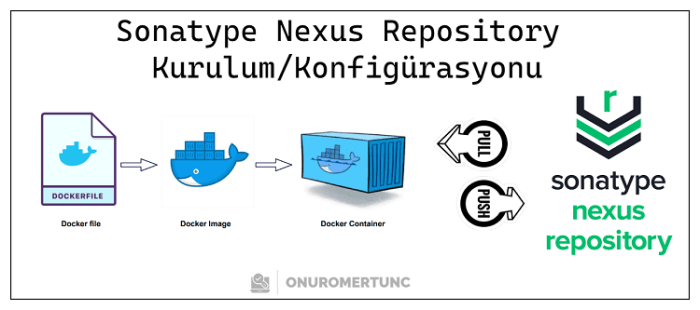
Introduction to Sonatype Nexus
Sonatype Nexus is a repository manager that allows you to proxy, collect, and manage your dependencies. It simplifies the process of managing binary components and improves the efficiency of the development workflow.
Using Sonatype Nexus in software development is crucial for ensuring that all dependencies are managed efficiently, reducing the risk of vulnerabilities, and improving overall software quality. It provides a centralized location for storing artifacts, managing access control, and automating repository maintenance tasks.
Importance of Sonatype Nexus
- Reduces the risk of using outdated or vulnerable dependencies by providing a centralized repository for managing components.
- Improves build times and project efficiency by caching dependencies locally and optimizing access to remote repositories.
- Enhances collaboration among development teams by providing a single source of truth for dependencies and artifacts.
Companies benefitting from Sonatype Nexus
- Large enterprises in the financial sector rely on Sonatype Nexus to ensure the security and compliance of their software applications.
- Software development companies use Sonatype Nexus to streamline their build processes and manage dependencies effectively.
- Open-source projects leverage Sonatype Nexus to maintain a central repository for sharing and distributing project artifacts.
Installing Sonatype Nexus

When it comes to installing Sonatype Nexus, it is essential to follow a step-by-step process to ensure a successful installation. Let’s delve into the details of how to install Sonatype Nexus, along with the system requirements and best practices for a smooth setup.
System Requirements
Before diving into the installation process, it is crucial to understand the system requirements for Sonatype Nexus. Make sure your system meets the following specifications:
- Minimum 4GB of RAM
- Quad-core processor
- At least 200GB of disk space
- Java Development Kit (JDK) 8 or newer
Installation Steps
Here are the step-by-step instructions to install Sonatype Nexus:
- Download the Sonatype Nexus repository manager from the official website.
- Install Java Development Kit (JDK) if not already installed on your system.
- Extract the downloaded Nexus repository manager package to a directory on your system.
- Configure the Nexus repository manager by editing the configuration files as needed.
- Start the Nexus repository manager by running the appropriate script or command.
- Access the Nexus repository manager through a web browser and complete the setup process.
- Set up repositories, users, and permissions according to your requirements.
It is recommended to regularly update your Sonatype Nexus installation to ensure security and performance improvements.
Configuring Sonatype Nexus
After successfully installing Sonatype Nexus, the next crucial step is to configure it according to your requirements. Configuration involves setting up repositories, user access, security settings, and other parameters to optimize performance and meet your specific needs.
Repository Configuration
One of the key aspects of configuring Sonatype Nexus is setting up repositories. You can create hosted repositories for storing your own artifacts, proxy repositories to cache external dependencies, and group repositories to combine multiple repositories into a single virtual repository.
- Hosted Repositories: These repositories store artifacts generated by your builds and can be accessed directly.
- Proxy Repositories: These repositories cache artifacts from external repositories, reducing download times and bandwidth usage.
- Group Repositories: These repositories combine multiple repositories to simplify artifact access for users.
User Access and Security
Managing user access and security settings is essential for protecting your artifacts and ensuring only authorized users can interact with the repository.
- Create user accounts with specific permissions to control access to repositories.
- Set up roles and privileges to define user capabilities within Nexus.
- Configure SSL certificates to secure communication between clients and the Nexus server.
Performance Optimization
To optimize the performance of Sonatype Nexus, consider the following configuration settings:
- Adjust memory settings in the JVM to allocate sufficient resources to Nexus.
- Optimize disk storage for repositories to ensure fast access to artifacts.
- Tune network settings to maximize data transfer speeds between Nexus and clients.
- Regularly monitor and analyze performance metrics to identify bottlenecks and areas for improvement.
Managing Repositories in Sonatype Nexus
When working with Sonatype Nexus, managing repositories is a crucial aspect of ensuring efficient and organized storage of artifacts. Repositories act as storage areas for different types of artifacts such as binaries, libraries, and dependencies.To create and manage repositories in Sonatype Nexus, follow these steps:
Creating Repositories
- Log in to your Sonatype Nexus instance with the appropriate credentials.
- Click on the “Repositories” tab in the Nexus dashboard.
- Choose the repository type you want to create (e.g., hosted, proxy, group).
- Provide the necessary information such as repository name, format, and storage location.
- Click on the “Create Repository” button to finalize the creation process.
Managing Repositories
- To manage existing repositories, navigate to the “Repositories” tab in the Nexus dashboard.
- You can edit repository settings, enable/disable repositories, or delete repositories as needed.
- Regularly monitor repository usage and clean up any unnecessary artifacts to optimize storage space.
Types of Repositories Supported
Sonatype Nexus supports different types of repositories to cater to various needs:
- Hosted Repositories: Store artifacts locally within Nexus, ensuring stability and availability.
- Proxy Repositories: Act as a cache for external repositories, reducing download times and improving build efficiency.
- Group Repositories: Combine multiple repositories into a single virtual repository, simplifying artifact access for users.
User Management in Sonatype Nexus
User management in Sonatype Nexus is crucial for controlling access to repositories, ensuring security, and maintaining accountability within the system. By effectively managing users, organizations can customize permissions, track user activity, and prevent unauthorized access to sensitive artifacts.
Adding Users in Sonatype Nexus
To add users in Sonatype Nexus, administrators can navigate to the “Security” section in the Nexus UI and select “Realms.” From there, they can choose the desired realm (such as LDAP or default) and add users by specifying their username, password, and roles. It is essential to assign appropriate roles to users based on their responsibilities to control their access level accurately.
Removing Users in Sonatype Nexus
Removing users from Sonatype Nexus can be done by accessing the “Security” section and selecting the “Users” tab. Administrators can then search for the user to be removed and delete their account from the system. It is essential to regularly review and update the user list to revoke access for users who no longer require it.
Configuring User Permissions in Sonatype Nexus
Configuring user permissions involves assigning roles and privileges to users based on their requirements. By defining roles with specific permissions (such as read-only, deploy, or admin), administrators can control the actions users can perform within the repository. It is recommended to follow the principle of least privilege and grant users the minimum permissions necessary to fulfill their tasks.
Best Practices for Securing User Accounts in Sonatype Nexus
- Enforce strong password policies to ensure that user accounts are protected from unauthorized access.
- Implement multi-factor authentication to add an extra layer of security to user logins.
- Regularly audit user accounts and permissions to detect any anomalies or unauthorized access attempts.
- Educate users on best security practices and the importance of safeguarding their credentials.
- Monitor user activity and set up alerts for suspicious behavior to proactively mitigate security risks.
Concluding Remarks
From installation to user management, Sonatype Nexus proves to be a vital asset for enhancing software development processes. By following the Artikeld steps and best practices, you can leverage its capabilities to streamline your workflow and ensure a secure development environment.