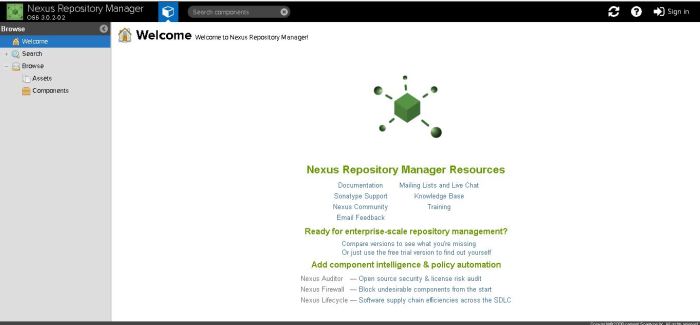
Embark on the journey of Nexus installation, where software development meets seamless efficiency and streamlined processes. From understanding its significance to exploring installation methods, this topic delves deep into the world of Nexus with a mix of informative insights and practical tips.
Overview of Nexus Installation
Nexus is a repository manager used for storing, managing, and distributing software components. It plays a crucial role in software development by providing a centralized location for developers to access dependencies, release artifacts, and other components essential for building software projects.Installing Nexus in a development environment offers several benefits. Firstly, it allows for efficient management of dependencies by providing a single source of truth for all components.
This helps in avoiding version conflicts and ensures consistency across projects. Additionally, Nexus enables faster build times by caching dependencies locally, reducing the need to download components repeatedly from external sources.There are different versions of Nexus available for installation, catering to the varying needs of users. The two main versions are Nexus Repository Manager OSS (Open Source Software) and Nexus Repository Manager Pro.
The OSS version is free to use and provides basic repository management functionality, while the Pro version offers additional features such as advanced security capabilities, support for more repository formats, and enhanced performance. Users can choose the version that best suits their requirements and upgrade as needed to access more features and capabilities.
System Requirements
To ensure a successful installation of Nexus, it is crucial to meet the following system requirements:
Minimum Hardware Requirements
- Processor: Dual-core 2.0 GHz or higher
- RAM: 4 GB
- Storage: 10 GB available space
Supported Operating Systems
- Windows 7, 8, 10 (64-bit)
- macOS 10.12 or later
- Linux distributions (Ubuntu, CentOS, Debian, etc.)
Software Dependencies
- Java Development Kit (JDK): Nexus requires JDK 8 or later to be installed on the system.
- Web Browser: An updated web browser such as Chrome, Firefox, or Safari is recommended for accessing Nexus web interface.
Installation Methods
When it comes to installing Nexus, there are several methods you can choose from based on your preferences and requirements. Let’s take a look at the manual installation process, using package managers like Yum or Apt, and the comparison between installing Nexus using a binary archive versus Docker.
Manual Installation Process
To manually install Nexus, you will need to download the Nexus repository manager package from the official website. Once downloaded, you can follow these steps:
- Extract the downloaded package to your desired directory on your server.
- Configure the Nexus repository manager by modifying the necessary configuration files.
- Start the Nexus repository manager by running the appropriate command.
- Access the Nexus web interface through your web browser to complete the setup process.
Installing Nexus using Package Managers
When using package managers like Yum or Apt, the installation process becomes more streamlined. Here’s how you can install Nexus using these package managers:
- Update the package manager’s repository to ensure you have the latest version of Nexus available.
- Run the command to install Nexus, which will automatically handle the installation process for you.
- Once the installation is complete, you can access the Nexus web interface to configure and set up your repository manager.
Binary Archive vs. Docker Installation
Installing Nexus using a binary archive involves downloading the archive file, extracting it, and configuring the repository manager manually. On the other hand, using Docker simplifies the installation process by running Nexus in a containerized environment. Here are some key points to consider when choosing between the two methods:
- Binary Archive: Provides more control over the installation process and customization options.
- Docker: Offers a quick and easy way to set up Nexus without worrying about manual configurations.
- Consider your requirements for flexibility, ease of use, and maintenance when deciding between a binary archive or Docker installation.
Configuration Settings

After successfully installing Nexus, it is crucial to configure certain settings to optimize its performance and security. This includes setting up repositories for artifact storage and configuring user authentication and access control.
Configuring Repositories
- Create repositories for storing different types of artifacts, such as proxy repositories for external dependencies, hosted repositories for internal artifacts, and group repositories for combining multiple repositories.
- Configure repository targets, formats, and policies based on your project requirements.
- Set up repository routing rules to prioritize artifact retrieval and storage.
Configuring Security Settings
- Enable secure connections using HTTPS to encrypt data transmission between the Nexus server and clients.
- Implement user authentication mechanisms, such as LDAP, Active Directory, or OAuth, to control user access to repositories.
- Set up role-based access control (RBAC) to define user permissions for repository access, artifact uploading, and administrative tasks.
- Regularly update user passwords and review access permissions to maintain a secure environment.
- Utilize audit logs to monitor user activities and track changes made to the Nexus configuration.
End of Discussion

In conclusion, Nexus installation stands as a pivotal step towards enhancing software development workflows, ensuring optimal performance, and secure artifact storage. With the right configurations and setup, Nexus becomes a cornerstone in the realm of efficient development practices.