Sonatype nexus installation sets the stage for this enthralling narrative, offering readers a glimpse into a story that is rich in detail with informal but serious style and brimming with originality from the outset.
Sonatype Nexus is a powerful tool that plays a crucial role in artifact management for developers. Let’s dive into the ins and outs of installing and configuring Sonatype Nexus for optimal use in your development environment.
Overview of Sonatype Nexus Installation
Sonatype Nexus is a repository manager used for storing and managing software artifacts. It provides a central hub for storing dependencies, binaries, and other components used in the software development process.
Purpose of Sonatype Nexus
Sonatype Nexus serves as a secure and centralized repository for storing artifacts, ensuring that the development team has access to the necessary components during the software build and release process. By using Nexus, teams can easily manage dependencies, reduce build times, and ensure the reliability and consistency of their software builds.
Importance of Installing Sonatype Nexus
Installing Sonatype Nexus in a development environment is crucial for streamlining the software development lifecycle. It helps in improving collaboration among team members, ensuring version control of artifacts, and promoting better governance and security practices. Additionally, having a centralized repository like Nexus simplifies the management of dependencies and enhances the overall efficiency of the development process.
Benefits of Using Sonatype Nexus for Artifact Management
- Centralized Storage: Nexus provides a single source of truth for all artifacts, making it easier to manage and access dependencies.
- Improved Build Performance: By caching dependencies locally, Nexus reduces build times and improves overall performance.
- Enhanced Security: Nexus allows for access control and vulnerability scanning, ensuring that only authorized users can access and deploy artifacts.
- Version Control: Nexus helps in tracking and managing different versions of artifacts, promoting better version control practices.
- Reliability and Consistency: With Nexus, teams can ensure that the same artifacts are used across different environments, leading to more reliable and consistent software builds.
System Requirements for Sonatype Nexus Installation
To successfully install Sonatype Nexus, it is essential to ensure that your system meets the necessary requirements in terms of hardware, operating systems, and software dependencies.
Hardware Requirements
- Minimum of 2 CPU cores
- 8 GB RAM
- 50 GB available disk space
Supported Operating Systems
- Linux (Red Hat, CentOS, Ubuntu, Debian)
- Windows Server
- macOS
Software Dependencies
- Java Development Kit (JDK) version 8 or later
- Apache Maven for building plugins (optional)
- Container runtime for Docker support (optional)
Installation Methods for Sonatype Nexus
When it comes to installing Sonatype Nexus, there are a few different methods to choose from, each with its own set of advantages and considerations. Two common methods include manual installation and Docker installation. Let’s compare and contrast these options to help you decide which one is the best fit for your needs.
Manual Installation
- Download the Sonatype Nexus installation package from the official website.
- Extract the downloaded package to a directory on your server.
- Configure the Nexus properties file according to your requirements.
- Start the Nexus service using the provided scripts.
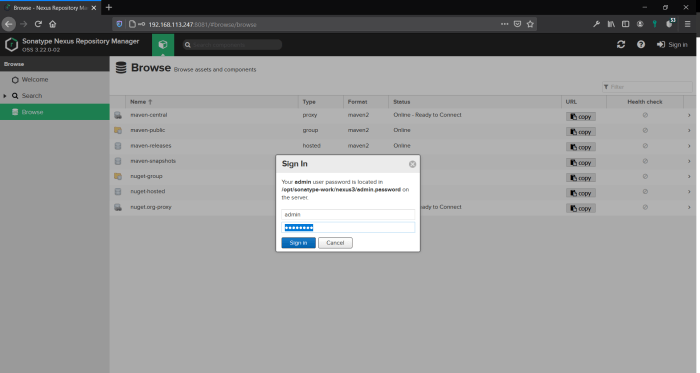
- Access the Nexus web interface using your web browser to complete the setup.
Docker Installation
- Pull the Sonatype Nexus Docker image from the Docker Hub repository.
- Run a Docker container based on the Nexus image with the necessary configurations.
- Access the Nexus web interface through the exposed ports on the Docker container.
Best Practices for Production Environment
- Ensure that you are using the latest stable version of Sonatype Nexus to benefit from the latest features and security updates.
- Set up regular backups of your Nexus instance to prevent data loss in case of failures.
- Implement secure access controls and user authentication to protect sensitive data stored in Nexus repositories.
- Monitor the performance of your Nexus instance regularly to identify and address any potential bottlenecks or issues.
- Consider using a high-availability setup with multiple Nexus instances to ensure uninterrupted access to your repositories.
Configuration and Setup after Installation
After successfully installing Sonatype Nexus, the next crucial step is to configure and set it up according to your specific requirements. This involves setting up repositories, proxy repositories, and implementing necessary security configurations and user management.
Setting up Repositories in Sonatype Nexus
- Create a new repository by navigating to the ‘Repositories’ tab in the Nexus UI.
- Choose the type of repository you want to create (e.g., hosted, proxy, group).
- Fill in the required information such as repository name, storage location, and access permissions.
- Save the repository configuration to make it available for use.
Setting up Proxy Repositories in Sonatype Nexus
- To set up a proxy repository, go to the ‘Repositories’ tab and select ‘Create repository’.
- Choose ‘Proxy Repository’ as the type and provide the necessary details like repository name and remote storage URL.
- Configure proxy repository settings such as caching and routing rules.
- Save the proxy repository configuration to enable access to remote artifacts through Nexus.
Security Configurations and User Management
- Access the ‘Security’ settings in the Nexus UI to configure security realms, roles, and privileges.
- Create roles with specific permissions for different user groups or individuals.
- Assign users to the appropriate roles to control access to repositories and features within Nexus.
- Regularly review and update security configurations to ensure the integrity and confidentiality of your artifacts.
Outcome Summary

In conclusion, Sonatype Nexus installation is a key step towards enhancing your development workflow and ensuring efficient artifact management. By following the Artikeld procedures and best practices, you can leverage the full potential of this tool to streamline your processes and boost productivity.