Embark on your War Thunder journey with our comprehensive guide to installation. From pre-installation steps to troubleshooting, we’ve got you covered every step of the way.
Learn about system requirements, installation methods, and post-installation setup to ensure a smooth gaming experience.
Pre-Installation Steps
To ensure a smooth installation process for War Thunder, there are a few important steps to consider beforehand.
Minimum System Requirements
- OS: Windows 7/Vista/8/10
- Processor: 2.2 GHz
- Memory: 4 GB RAM
- Graphics: Intel HD Graphics 4000
- DirectX: Version 11
- Network: Broadband Internet connection
- Storage: 15 GB available space
Checking Storage Space
Before starting the installation process, it is crucial to ensure that your system has at least 15 GB of available storage space. This will prevent any interruptions during the installation and make sure the game runs smoothly once installed.
Stable Internet Connection
Having a stable internet connection is essential during the installation process of War Thunder. This will ensure that all necessary files are downloaded correctly and prevent any issues that may arise from a poor connection.
Installation Methods
To begin playing War Thunder, you have a few different options for installation. Whether you prefer to download the game directly from the official website or through a gaming platform like Steam, the process is straightforward and can have you in the action in no time.
Downloading from the Official Website
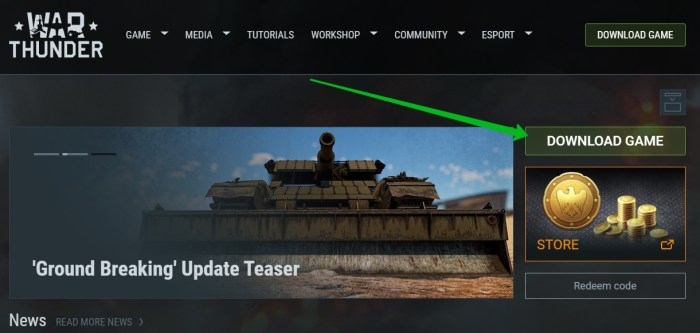
- Visit the official War Thunder website at [www.warthunder.com] and locate the download button.
- Click on the download button and follow the on-screen instructions to save the installation file to your computer.
- Once the download is complete, locate the file and double-click to start the installation process.
- Follow the installation wizard, selecting your preferred language, installation directory, and any additional settings.
- After the installation is complete, launch the game and begin your adventure in War Thunder.
Installing via Gaming Platform (e.g., Steam)
- Open your gaming platform, such as Steam, and search for War Thunder in the store.
- Click on the game and select the option to download and install it on your system.
- Follow the platform’s instructions to complete the installation process.
- Once the game is installed, launch it through the platform and start playing.
Advantages of Launcher vs. Direct Download
- Using the launcher provided by the official website ensures you have the latest version of the game and easy access to updates.
- Direct download may be faster for some users, as it does not require an additional platform like Steam.
- Installing through a gaming platform like Steam can provide social features, automatic updates, and a centralized library of games.
- Ultimately, the choice between the launcher and direct download depends on your preferences for convenience and access to additional features.
Troubleshooting Installation Issues

When installing War Thunder, users may encounter various issues that can hinder the process. It is essential to address these problems promptly to ensure a smooth installation experience. Below are some common installation problems faced by users along with solutions to resolve them.
Installation Freezing
- Check system requirements to ensure your device meets the minimum specifications for running War Thunder.
- Close any unnecessary background applications that may be causing a strain on system resources.
- Restart your computer and try reinstalling the game to see if the freezing issue persists.
- If the problem continues, contact War Thunder support for further assistance.
Errors during Installation
- Ensure that you have a stable internet connection throughout the installation process.
- Disable any antivirus software temporarily as it may be blocking the installation files.
- Try running the installer as an administrator to avoid permission issues.
- If you encounter specific error messages, search for solutions online or contact support for guidance.
Importance of Updating Graphics Drivers
Updating your graphics drivers is crucial for a smooth installation and gameplay experience in War Thunder. Outdated drivers can lead to compatibility issues, performance problems, and graphical glitches. Make sure to regularly check for updates from your graphics card manufacturer and install the latest drivers to optimize your gaming experience.
Post-Installation Setup
After successfully installing War Thunder, the next steps involve creating a War Thunder account, customizing in-game settings for optimal performance, and installing updates and patches to ensure smooth gameplay.
Creating a War Thunder Account
To create a War Thunder account, simply launch the game and follow the on-screen prompts to register. You will need to provide a valid email address, a username, and set up a password. Once your account is created, you can log in and start playing.
Customizing In-Game Settings
Customizing in-game settings is essential to optimize your gameplay experience. To do this, navigate to the settings menu within the game. Here, you can adjust graphics settings, controls, sound options, and other preferences to suit your gaming style and hardware capabilities. Experiment with different settings to find the perfect balance between performance and visual quality.
Installing Updates and Patches
Regularly installing updates and patches is crucial to ensure that you have the latest features, bug fixes, and improvements in War Thunder. The developers frequently release updates to enhance gameplay, fix issues, and introduce new content. Make sure to enable automatic updates in the game settings or manually check for updates to stay up to date with the latest version of War Thunder.
Outcome Summary
Get ready to dive into the thrilling world of War Thunder as you follow our expert tips and tricks for a seamless installation process.